Thursday, December 23, 2010

Happy Holidays!!


I don't know about you, but this particular moment is one of my favorites of the Christmas season.  That moment of total relief when the last of the presents are wrapped.  Phew!  Now I can start enjoying the holidays!


I have several finishes I'd love to share with you, but since they are mostly gifts, I won't be posting them just yet.  Craftopotamus is getting a holiday too, so the blog will be back sometime during the first week in January 2011!  Happiest of holidays to all of you!!

Friday, December 17, 2010

Santa's Workshop

Santa's workshop, AKA my craft room, is BUSY as always this time of year.  I have pics of some works in progress for you...


This is a scarf that will have a matching hat and that I had hoped to finish as a Christmas gift, but will not make it.  Both ends of the scarf with have that little ruffle on the end.


Here is a shawl that I finished last night.  There is a slight variegation from pink to aqua blue, but it's subtle so it doesn't show up in the pic well.  I need to make a pin to go with it still.


And these are a pair of booties that I made for my son, but I still need to sew some faux suede on the bottom.  They're to slick for tile and wood floors as is.  I might add some more decorative details as well.


I stitched up some of my new Spring Garden yarn to get a gauge on size 15 needles.  My latest plan is to make a cowl with it.  I'm going to try and hold off on starting this one until after Christmas.  Can't wait!


And just to break up the yarn fest, I've also made some progress on this quilt.  I'm hoping to sew these blocks together some time over the weekend.

Am I the only one who manages to over-commit herself EVERY holiday season?!

Tuesday, December 14, 2010

For the Love of Wool


After months of drooling over the amazing yarns in Keya's shop, I finally broke down and made a purchase from Zibeline Knits.  Don't you love her labels?  The top yarn is a sock weight yarn called Marina.  I plan on knitting a scarf, hat, and socks for Kenny from them after the holidays.

Love the colors...


And this one is called Spring Garden.  I am swooning over it.  I love the combination of the yellow and deep periwinkle blue.  The wool came straight from the sheep, then she spun it and dyed it.  This type of thick and thin yarn is my favorite... they produce such beautiful textures.


When I was done winding it into a ball that I could knit with, I noticed my hands had a fine layer of lanolin on them.  I wish I could afford to knit with such pure wool all the time.

It will probably become a scarf sometime after the holidays, although I'm still thinking about it.  At this point, my craft room is stacked with Christmas gift projects.  I hope to post an update on those in the next couple days - it'll probably make for a long post.  :)

Saturday, December 11, 2010

Glass Holiday Ornament

This was originally a guest post featured on Haul Out the Holly last week...

I've whipped a quick and easy Christmas ornament tutorial for you.  You will need:

1 package clear glass ball ornaments
tinsel, garland, paper craft shred, yarn, etc. to your liking
paint markers or sharpies
either ornament hooks or ribbon
(ignore the spray paint, I ended up saving that for another project)


Start with one so-boring-you-can-hardly-see-it clear glass ornament.


Remove the top...


Stuff it with paper shred, or cut up tinsel, garland, yarn, etc.


For this one, I used green craft shred. You may want to use a pen or a knitting needle or something along those lines to distribute the stuffing once it is inside the ornament.  Then, replace the top...


Use the paint markers to personalize them any way you'd like.


Make a few more... here's one with cut up icicles.


You can even decorate them with simple pictures... anything you can draw... I don't have one, but I bet some of those vinyl decal things everyone else seems to have would also be great here... For this one I stuffed it with cut up pieces of red metallic garland.


You can use an ornament hook to hang them or make a ribbon hanger.I just used ornament hooks because these are going on my tree, but if their for a gift you may want to snazz them up with ribbon. 

And that's it!  You're done!  Nice and easy!


The last one on the left is one that I filled with blue yarn.  I hope this gave you lots of great ideas!!

I'll be linking this up to many of the awesome parties in my Link Parties tab, including Met Monday... check 'em out!

Saturday, December 4, 2010

Haul Out the Holly!

Hey everybody!  I'm guest posting today over at Gwenny Penny for Haul Out the Holly... stop by and check it out!


Haul out the Holly,Gwenny Penny,Christmas craft tutorials

And just for fun, here's a pic of my son enjoying the first snow of the season this morning...

Friday, December 3, 2010

One of a Kind

Dear blogland, I apologize for my brief hiatus, but grad school got the best of me these last couple weeks.  Fortunately, I only have one paper left this coming week and then the semester is over and I can get back to exercising my creative energy.

I did get a chance to spend a couple of hours at the One of a Kind Show and Sale in Chicago at the Merchandise Mart yesterday.  It was amazing.  I really didn't realize how huge it was going to be and the talent pool for this show is just awe-inspiring.  Unfortunately, I did not think to bring my camera.  Such a shame too because there was some beautiful art as well as some amazing fiber artists. 

But I can share with you some things that I bought at the show!

I took the opportunity to do a little Christmas shopping at Blush Envy's booth while I was there...


Brandy's jewelry is amazing.  These flowers are all hand-crafted from paper and you'd be surprised at how durable her pieces are!  Her Etsy shop will reopen in January, but if you get a chance to get to the show you should definitely check out her booth.  You can also find her on facebook here.


Another Christmas gift... the detail is incredible...


And, of course, I did a little Christmas shopping for myself as well...


This is one of her "dainty" rings.  It perfectly matches a sweater of mine.


This next piece I found at another vendor there that happens to be a Chicago artist.  Her name is Carrie Notari of Notari Studio.  She's got some pretty neat pieces and I bought this one for myself...


Check out the back... it's a domino!  LOVE!


The One of a Kind show was really amazing and if you live anywhere near Chicago try and sneak in a visit.  It runs through Sunday and you will not regret it.

Also, just a reminder that Haul Out the Holly is going on now over at Gwenny Penny.  Check it out!  My tutorial will be featured there tomorrow...

Monday, November 22, 2010

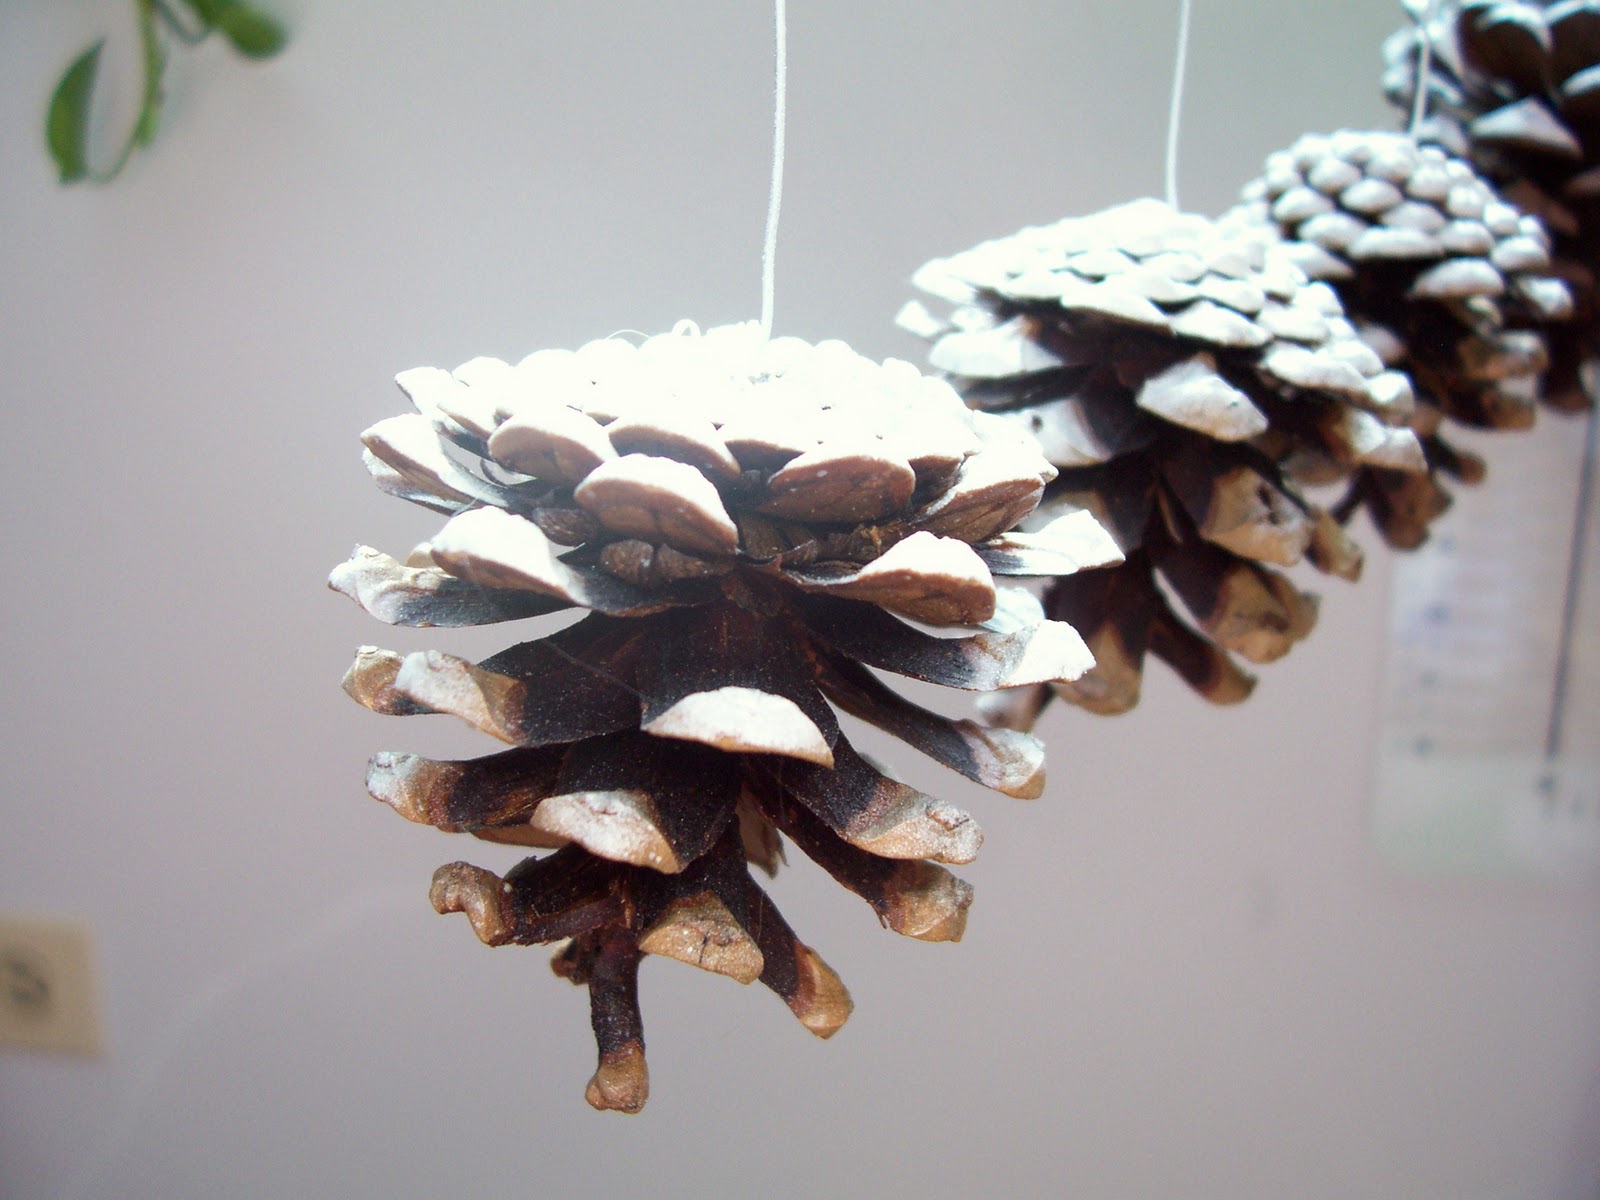
Snowy Pine Cone Christmas Ornaments


I'm in the final push of the semester at school.  In the next 10 days I'll be coming up with about 35 pages of reports and papers.  Should be a good time.  In the meantime, I hit a wedding in Florida this weekend, finished my tutorial for Haul Out the Holly (no sneak peeks, but I'll let you know what day it will be showing), and came up with this quick and easy Christmas ornament.

Supplies:
a pile of pine cones (you can gather them or buy a bag)
ornament hooks
white spray paint
hot glue gun


Now I have to admit, this isn't an original idea, per se.  The year before my grandfather passed, he went out into our backyard and gathered up a bunch of pine cones.  Then he attached bent paper clips to them and strung them up on a string in our basement.  He spray painted the tops white.  I still remember them hanging there.  Apparently, crafting must run in the family.  A day later he hung them on our Christmas tree.  They look phenomenal, but that was almost two decades ago now and the ones we have left are a little worse for wear.  So I made another batch and am sharing them with you here.

The first step is to bend one end of the hooks into a flat little shape, almost like a "c," and then hot glue them to the tops of the pine cones.  You'll need to hold the hook there for a moment until the glue hardens a bit.


Do that for all of your pine cones and then string them on a line of some kind once they're totally dry.


Now just spray the tops with the white spray paint.  You can get the most natural result by spraying all of the pine cones from directly above.  You don't want to cover them entirely... just make them look like the snow fell on top of them.


And that's it!


I would have loved to include a picture of them on my tree, but as a rule I don't put mine out before the day after Thanksgiving.  But I really love having a bunch of the same ornament to hang all over the tree amidst all the other ornaments because it really helps give it a more cohesive look.  And these go with just about any tree decor because they look so natural.  Enjoy!

I'll be linking this up to all the fab parties under my Link Party tab, including Met Monday!