Monday, November 22, 2010

Snowy Pine Cone Christmas Ornaments


I'm in the final push of the semester at school.  In the next 10 days I'll be coming up with about 35 pages of reports and papers.  Should be a good time.  In the meantime, I hit a wedding in Florida this weekend, finished my tutorial for Haul Out the Holly (no sneak peeks, but I'll let you know what day it will be showing), and came up with this quick and easy Christmas ornament.

Supplies:
a pile of pine cones (you can gather them or buy a bag)
ornament hooks
white spray paint
hot glue gun


Now I have to admit, this isn't an original idea, per se.  The year before my grandfather passed, he went out into our backyard and gathered up a bunch of pine cones.  Then he attached bent paper clips to them and strung them up on a string in our basement.  He spray painted the tops white.  I still remember them hanging there.  Apparently, crafting must run in the family.  A day later he hung them on our Christmas tree.  They look phenomenal, but that was almost two decades ago now and the ones we have left are a little worse for wear.  So I made another batch and am sharing them with you here.

The first step is to bend one end of the hooks into a flat little shape, almost like a "c," and then hot glue them to the tops of the pine cones.  You'll need to hold the hook there for a moment until the glue hardens a bit.


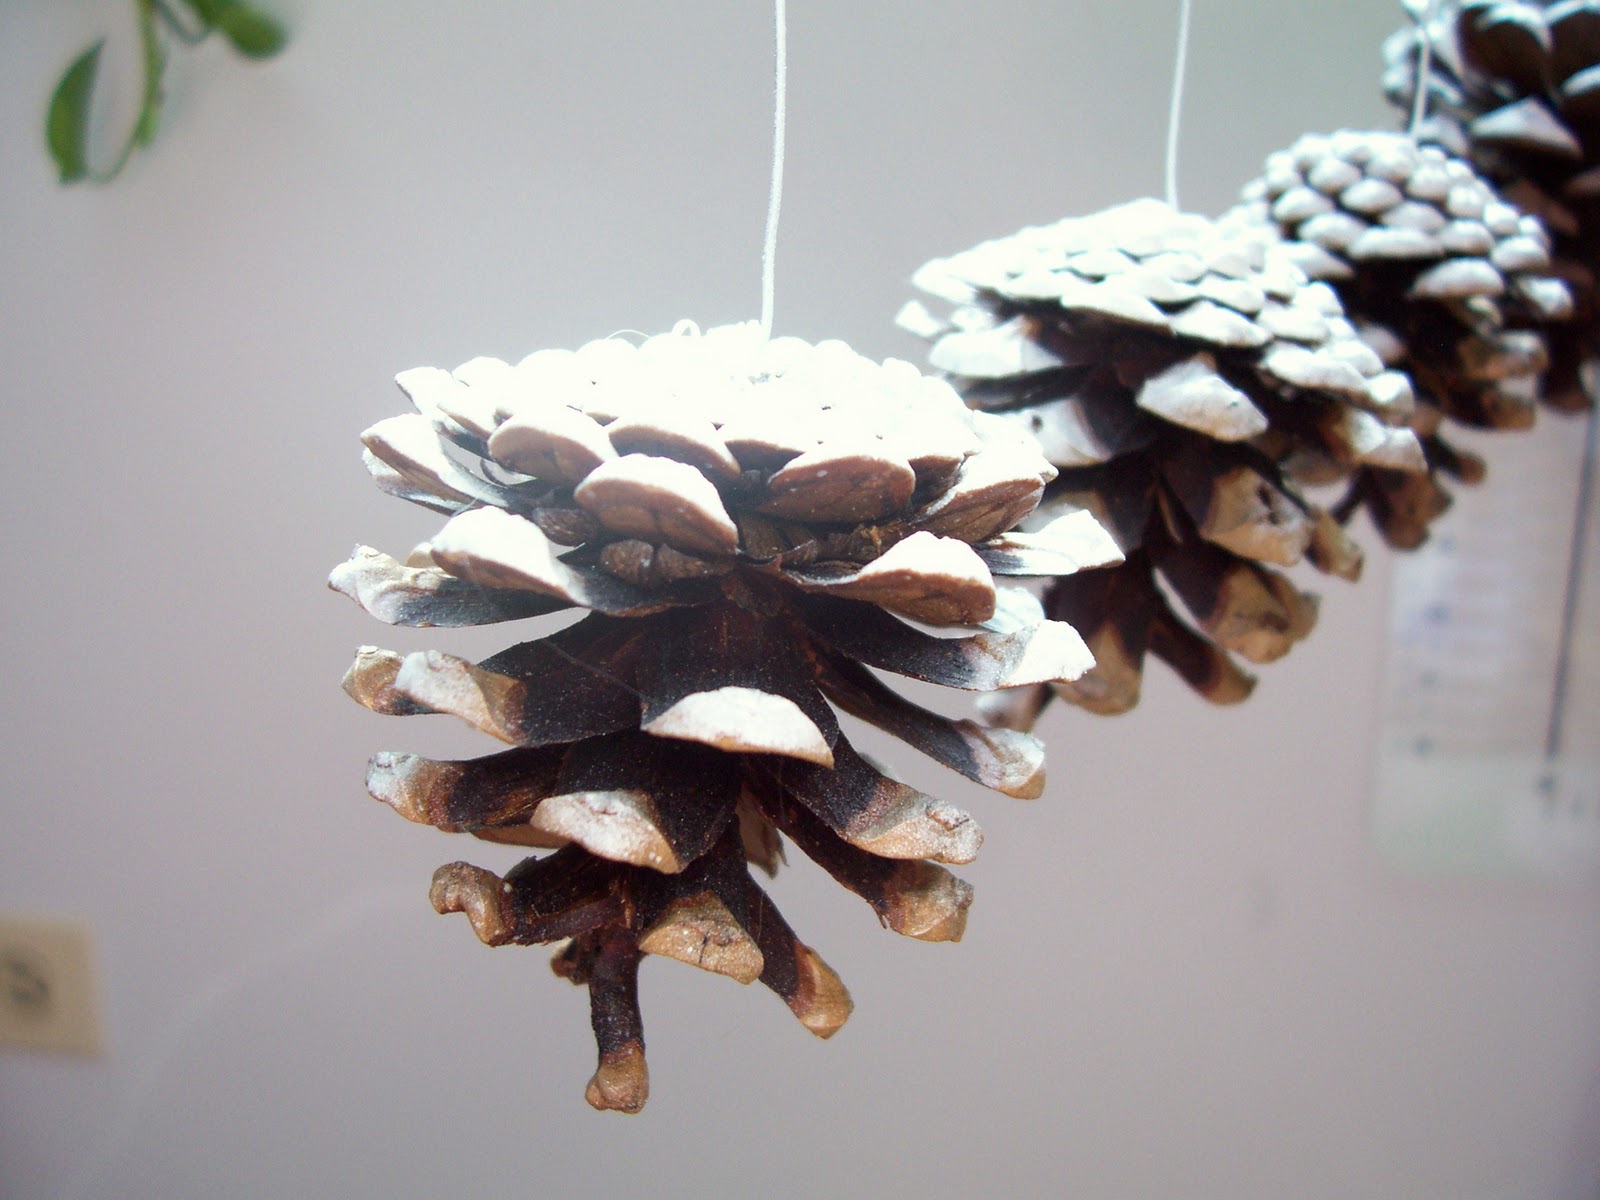
Do that for all of your pine cones and then string them on a line of some kind once they're totally dry.


Now just spray the tops with the white spray paint.  You can get the most natural result by spraying all of the pine cones from directly above.  You don't want to cover them entirely... just make them look like the snow fell on top of them.


And that's it!


I would have loved to include a picture of them on my tree, but as a rule I don't put mine out before the day after Thanksgiving.  But I really love having a bunch of the same ornament to hang all over the tree amidst all the other ornaments because it really helps give it a more cohesive look.  And these go with just about any tree decor because they look so natural.  Enjoy!

I'll be linking this up to all the fab parties under my Link Party tab, including Met Monday!

Monday, November 15, 2010

A Feature, Some Fabric and a Future Felt

My button jewelry was featured over at Pinkapotamus today!  Thank you!  Amie Ann started a new Monday party a few weeks ago... you should check it out.  I added her super cute button to my Features page...

Featured on Pinkapotamus

I also keep forgetting to mention that I actually won something from the Blogger's Quilt Festival.  HOORAY and super huge thanks to Amy for hosting the festival!  I won a $20 gift certificate to Pink Chalk Fabrics.  It's a lovely online fabric store and I have to admit that I've been struggling to decide just what I want.  I think I will probably get 4 charm packs of this fabric collection...


It's called Dream On by Urban Chiks and I kinda like it.  It's sort of retro/happy/sweet and the colors are great.  I think with four packs I could make a decent sized quilt with some sashing or something... what do you think?

I've been tossing around lots of ideas for quilts lately, but have had no time to make any serious progress in that department and won't for a few more weeks.  Ugh.  But I have finally acquired all of the things I need to get started on my Christmas tutorial for Haul Out the Holly.  Now I just have to carve out a little more time...

And I have made some progress on my felting project.


Clearly, it's not felted yet, but it will be one day.  I still need to make it about 3 times the size it is now.  My intention is to make a messenger bag styled back pack.  After I make this one big long piece, I will felt it, sew on some sides, add a lining and straps and some buttons and hopefully it'll all work out.  I'm positive that doesn't make any sense without a pic, but I have to get back to paper writing so a sketch will have to wait.  It looks great in my head!  :)  LOL.

Wednesday, November 10, 2010

Button Bracelet and Earrings

With how short my crafting time has been lately, I've switched tactics and have been trying smaller projects.


I stashbusted to make this bracelet and pair of earrings.  It only took about 2 hours total for the project, but I worked on it in little chunks as a study break.


The buttons came from my stash, but I think the bulk of them came from one of those packs they sell that has a bunch of plastic buttons that are all in similar colors, but different styles and sizes.  The jump rings were probably about a quarter inch in size and are a heavier gauge wire.  Their are also a few random beads and findings thrown in and I used a silver-plated toggle clasp because I can't get braclets on and off unless I use them.


And, obviously, I used a pair of earwires for the earrings.  Both pieces making a lovely, quiet clicking noises.  I don't know why I like that, but I do.


One day I will finally break down and buy some jewelry displays...


Linking up to many of the fabulous parties in my Link Party tab, including Met Monday and Show & Tell Friday!  Check them out!

Sunday, November 7, 2010

Butterfly Journal and Haul Out the Holly


A friend of mine just celebrated a birthday.  I was able to make her a quick journal the other night.  The pictures aren't the greatest because I forgot to take them until after I'd given it to her.  I actually took all of these with my cell phone in a parking lot.  Here's to improvising.  :)

Just like when I made my Field Journal, I started with one of these (for more explicit directions you can check out the earlier post)...


I covered it in fabric, added some graphics, courtesy The Graphics Fairy, and a few odds and ends to get this...


Here's the back...


And the inside cover... the interior fabric is a brocade. 


I also alternately stamped some of the actual pages as well...


I also wanted to let everyone know that I'll be participating in an awesome upcoming event...


Haul out the Holly,Gwenny Penny,Christmas craft tutorials
 

It will consist of 12 days of holiday tutorials from 12 amazingly crafty bloggers.  I'll be working on my tutorial behind the scenes till then.  You can get more info by clicking on the button above.  Can't wait and I hope you get a chance to check it out!!

I'll be linking this up to many of the awesome parties included on my link party page, including Met Monday!  Check them out!

Friday, November 5, 2010

Felting and a Feature

I have really been enjoying the Blogger's Quilt Festival this week and it was a ton of fun to participate.  My Waves of Gratitude quilt was featured on Stephanie Lynn's Sunday Showcase Party this week as well.  Thank you!! 

I have loved every one of the comments on that quilt, too.  If I haven't responded to your comment directly, it's only because grad school is hitting the home stretch for me and my work load has increased significantly.  Probably my blogging will be a bit lighter through the first week of December because of it.

I have been transitioning into making Christmas presents as well.  Mostly still in the planning stages as of yet, but I have been trying to make myself a felted school bag.  I've never felted before, but I started with some Paton's Classic Wool Roving in a couple different colors and have started experimenting.


I started by basically crocheting a potholder-sized test swatch because I needed to figure out how the pieces would be shrinking.  This piece measured 8.25 inches before felting.

Then I threw it in the washing machine (warm water and detergent) with some laundry and then dried it on hot.  This is what I got...


It shrunk a bit, but I'm really glad that I did this swatch first because I learned that it did not shrink as much along the height of the stitches as it did on the width.  The length decreased to 7.5 inches and the width decreased to 6.75 inches.  Interesting...

I may actually try running through the machine again to see if I can make the stitches even less obvious.

Originally I was envisioning a bag that had maybe a checkerboard pattern of grey and blue blocks with black dividing each of the blocks, but now I'm thinking maybe stripes...  I may also switch to knitting and see what kind of changes that produces.  We'll have to see.